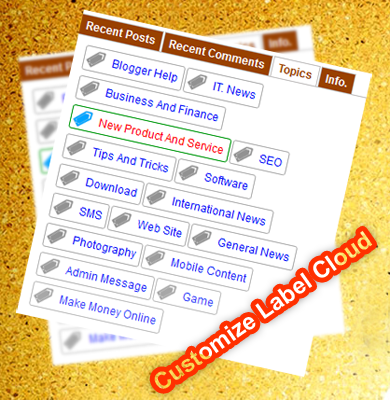
Blogger always try to serve their user with best service. Blogger is very user friendly to customize template, layout and post. Huge widget and plugins are hosted in blogger server. One of them is label widget. Today we will learn how to customize blogger’s official labels widget design as like below screenshot. This will change your label cloud list into small blocks that effect on mouse hover. This is compatible in all major web browser and I am sure this will attract your visitor’s eye. Previously we published customization tricks on Recent Posts Widget, Recent Comments Widget and Popular Posts widget. Check these out.

So, here we go, follow these simple steps...
1. Sign in to Blogger
2. Click your blog title
3. Select Layout and add Labels widget from list
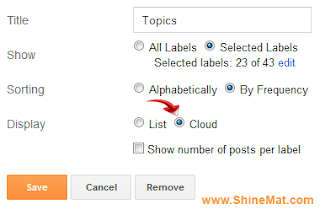
4. Now setup as like as shown below

If you have huge labels tag then select 25 to 30 labels. If average then select All labels.
5. Click Save
1. Select Template from left side menu
2. Backup your full template before editing
3. Click Edit HTML, Click Proceed
4. Now search for ]]></b:skin> by pressing Ctrl+F
5. Now simply paste the following CSS code before/ above it
6. Now click Save Template and you are done.
> To change bullet points simply change the yellow color image link with your own bullet point link.
> To change font size, change green color value. If you want to be size depending on your post count just delete font-size:12px;
Need help? Feel free to ask me for any assistance. Have fun!

So, here we go, follow these simple steps...
1. Sign in to Blogger
2. Click your blog title
3. Select Layout and add Labels widget from list
4. Now setup as like as shown below

If you have huge labels tag then select 25 to 30 labels. If average then select All labels.
5. Click Save
Now...
1. Select Template from left side menu
2. Backup your full template before editing
3. Click Edit HTML, Click Proceed
4. Now search for ]]></b:skin> by pressing Ctrl+F
5. Now simply paste the following CSS code before/ above it
/*-----Customize blogger's label widget www.shinemat.com start----*/
.label-size{
background: url(https://blogger.googleusercontent.com/img/b/R29vZ2xl/AVvXsEiMBxb1q4BSOmmM23i0RRRlxL0OXa2ONKx0uasgKPGseUgE6vgy8bTYT_XBc_285jVAG-umHYKe5L2D9QAuGyn0PqERjwEOnO_OjThhpBzY0OxL6B2VOuyjOXkyInhvXoAWN9g845xbVAo/s1600/1.png) no-repeat 2px;
margin:0 2px 6px 0;
padding:5px 5px 5px 30px !important;
text-transform: capitalize;
border: solid 1px #B0B0B0;
border-radius: 3px;
float:left;
text-decoration:none;
font-family:arial;
font-size:12px;
}

.label-size:hover {
background: url(https://blogger.googleusercontent.com/img/b/R29vZ2xl/AVvXsEhLJLmIshuyz-cCSpvB3ofPkkHk5S8mxpKUIIC9PdjTzxyEcNwERl-KhIYr_LZflVHP7FMejMGkTgmXkXEZxsBDsQj4Ks43FUnST8_oaUhNqDjS6A6dMInTQjyOZPsh4fXWdri3JANu3bs/s1600/2.png) no-repeat 2px;
border:1px solid #039A11;
text-decoration: none;
padding:5px 5px 5px 30px !important;
}

.label-size a  {
text-transform: capitalize;
float:left;
text-decoration: none;
}
.label-size a:hover  {
text-decoration: none;
}
/*-----Customize blogger's label widget www.shinemat.com end----*/
6. Now click Save Template and you are done.
Customization area
> To change bullet points simply change the yellow color image link with your own bullet point link.
> To change font size, change green color value. If you want to be size depending on your post count just delete font-size:12px;
Need help? Feel free to ask me for any assistance. Have fun!

I think this is really a very nice post.
ReplyDeleteWww.spensdriod.com
ReplyDeletePost a Comment
Please DON'T spam here. Spam comments will be deleted just after our review.